
Aniframe - Love animated
Building an AI generated picture frame

This year I went to CES. Buried behind all the robots and advancements in AI, there was a surprising amount of one thing—one thing I did not expect: e-paper picture frames. Digital wall art. Vendor after vendor had some new display, some subscription. Little did they know, I had already built myself a digital picture frame—one that was AI-powered, turning photos of me and my partner into an animated delight that changed every hour.
The Idea
The idea was simple.
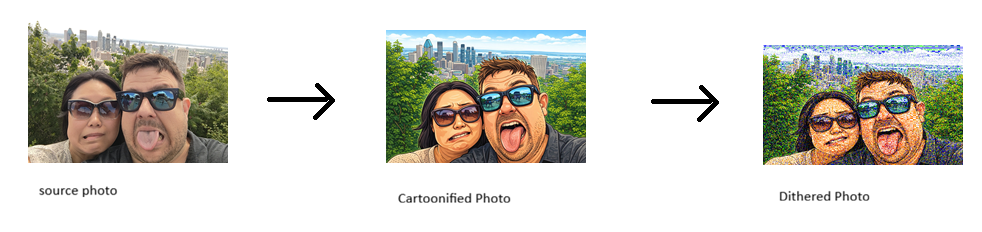
Upload photo
Turn it into a cartoon
Display photo
The Implementation
This was far less simple. First, I had to determine what hardware I could use. I ultimately decided on the following:
Raspberry Pi 5 (https://www.raspberrypi.com/products/raspberry-pi-5/)
Waveshare 7.3 Eink Display ( https://www.waveshare.com/7.3inch-e-paper-hat-f.htm)
Note: If I were doing this again, I would investigate something like the Pi Zero 2W to reduce the form factor, since not a ton of compute is done on the device—however, the 5 worked nicely.
The e-ink display had a nice range of compatibility with the Pi and the ability to display colored images. However, it only had 7-color support (far from true color), so I had to build a pipeline that could both convert the image to a cartoon and then reduce it to only 7 colors. This made for an interesting pipeline.
The Software
Knowing this, I had a clear workflow to create. First, I had to get the picture from somewhere. Then I needed to send it to an AI model to be cartoonified. Next, I needed to dither the photo so it would work on a 7-color display. Finally, once all that was done, I had to write a display driver that would pick a photo and display it every hour.
Step 1 – Getting the Source File. This part was at first complex, until a really obvious answer presented itself: I just mounted a shared folder from my NAS. The advantage is that if I later wanted to use cloud storage or something else, I could just use rclone or FUSE to mount the remote file system.
Step 2 – Making the Cartoon. When I first started this a year ago, I was using Stability AI to generate these images. However, OpenAI’s most recent models are more accurate and produce better results, so I switched. Ultimately, I chose their image_edit function with gpt-image-1.5. Simple, easy code:
    prompt = """
    Make a version of this image that is in the style of a cartoon.
    Please make it cartoony (exaggerated expressions).
    Please make the core image 800x480.
    """

    result = client.images.edit(
        model="gpt-image-1.5",
        image=[
            open(source, "rb"),
        ],
        prompt=prompt,
    )

    image_base64 = result.data[0].b64_json
    image_bytes = base64.b64decode(image_base64)
Step 3 – Dithering. Now that we had an image, we had to convert it. To do this, we use something called dithering. Dithering is the act of making a picture look like it has more colors than it does by placing colors next to each other in patterns that trick the brain into seeing a different color. It’s how GIFs in the '90s worked. :) The logic was simple: open the file, load our color palette (the 7 colors), then use PIL to dither the image and resize it to the 800×480 required for the screen.
palette = [
    (0, 0, 0),  # Black
    (255, 0, 0),  # Red
    (0, 255, 0),  # Green
    (0, 0, 255),  # Blue
    (255, 255, 0),  # Yellow
    (255, 165, 0),  # Orange
    (255, 255, 255),  # White
]


def save_image_8_color(image_path, output_path):
    """
    Saves an image with a maximum of 8 colors.

    Args:
        image_path (str): Path to the input image.
        output_path (str): Path to save the output image.
    """
    palette_data = bytearray()
    for color in palette:
        palette_data.extend(color)

    # Pad the palette to 256 colors if necessary
    while len(palette_data) < 768:
        palette_data.extend((0, 0, 0))

    palette_image = Image.new("P", (1, 1))
    palette_image.putpalette(bytes(palette_data))

    image = Image.open(image_path).convert("RGB")
    quantized_image = image.quantize(palette=palette_image, dither=True)
    new_size = (800, 480)
    resized_image = quantized_image.resize(new_size)
    resized_image.save(output_path)
Step 4 – Displaying the Image. Now that I had an image, I had to display it! This part was a bit of a challenge, just in getting all the hardware to work. First, I had to set up the SPI interface, which was easy:
sudo raspi-config
Choose Interfacing Options -> SPI -> Yes Enable SPI interface
Then, after a reboot, I had to install the right drivers. This is where the Waveshare documentation is out of date and doesn’t work with the Pi 5. Instead of just installing GPIO, we also have to install lgpio and configure it as the underlying driver:
pip install lgpio spidev python3-gpiozeroOnce that was working, I could display the picture using the libraries from Waveshare (which I included in the repo). This script grabs a random image from a folder and displays it using the epd7in3f library (the Waveshare device library):
import logging
import epd7in3f
import time
from PIL import Image,ImageDraw,ImageFont
import traceback

logging.basicConfig(level=logging.DEBUG)
picdir = os.path.join(os.path.dirname(os.path.dirname(os.path.realpath(__file__))), 'Aniframe/display_images')
def displayPic(epd):
    files = os.listdir(picdir)
    random_element = random.choice(files)

    #epd.Clear()
    logging.info("show file:" + random_element)
    Himage = Image.open(picdir  + "/" + random_element)
    epd.display(epd.getbuffer(Himage))
try:
    logging.info("epd7in3f Demo")

    epd = epd7in3f.EPD()
    logging.info("init and Clear")
    epd.init()
    #while True:
    displayPic(epd)
    logging.info("Goto Sleep...")
    epd.sleep()

except IOError as e:
    logging.info(e)

except KeyboardInterrupt:
    logging.info("ctrl + c:")
    epd.Clear()
    epd.sleep()
    epd7in3f.epdconfig.module_exit(cleanup=True)
    exit()
Step 5 – Cron Jobs. After getting all the scripts working, I set up two cron jobs: one that transforms images every half day, and another that updates the display every hour.
The Enclosure
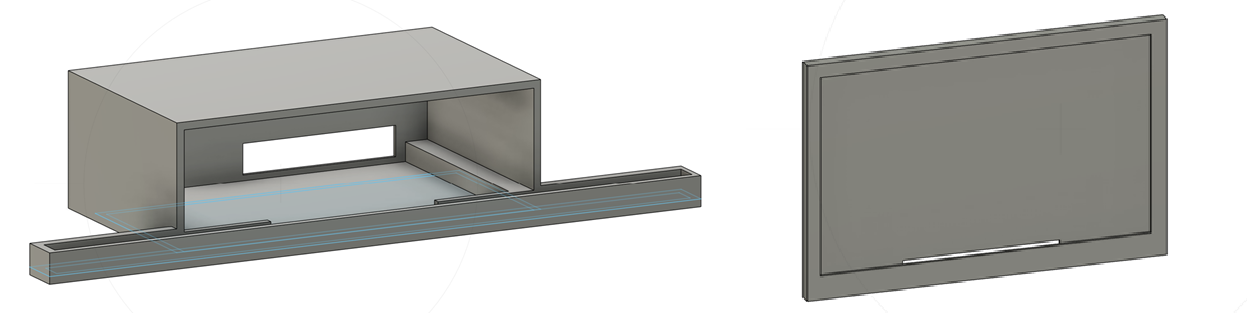
Full disclosure—I have no idea what I’m doing in 3D modeling. That said, I took on the challenge and created a simple enclosure for the Pi and display. One part held the display; the ribbon cable was able to pass behind it and then snap into a larger enclosure that housed the Pi.
Note: If you use the designs I provided, be careful—the tolerances are tight on the Pi holder, and you can (as I did) damage the SD card.
The Final Result.
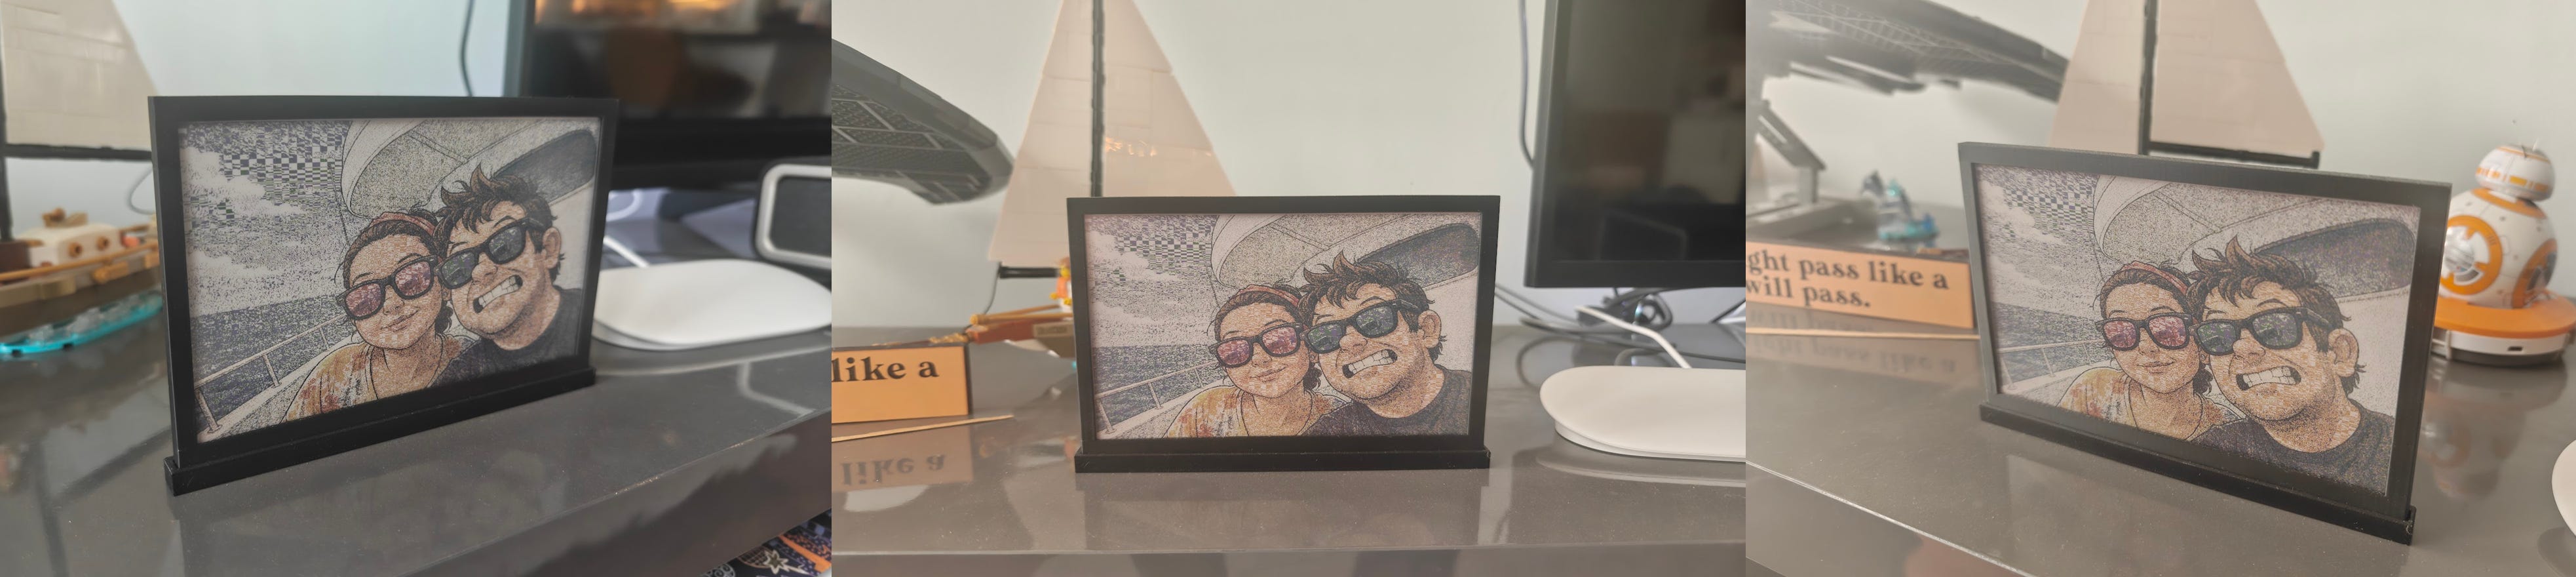
So I had scripts, an enclosure, and hardware. Cue montage sequence. Several hours later—and after much debugging—I had a thing that worked. And worked pretty well.
Want to build this yourself?
Disclosure: I am not liable if things break or don’t work right. This was just a hobby project. :)
Images and source code here - https://gitlab.com/floydhead01/ani-frame
Pi and Wave-share can be bought online :)